- KHI SỰ TINH GIẢN LÀ ĐỈNH CAO CỦA CÔNG NGHỆ BÁN HÀNG 2026 - PHẦN MỀM BÁN HÀNG BASYS
- Phần mềm bán hàng cho hộ kinh doanh BASYS đơn giản ít thao tác
- [C#] Hướng dẫn tích hợp thêm menu vào System menu của ứng dụng
- [DEVEXPRESS] Hỗ trợ tìm kiếm highlight không dấu và không khoảng cách trên Gridview Filter
- [C#] Chia sẻ source code phần mềm Image Downloader tải hàng loạt hình ảnh từ danh sách link url
- [C#] Chụp hình và quay video từ camera trên winform
- [C#] Chia sẽ full source code tách file Pdf thành nhiều file với các tùy chọn
- Giới thiệu về Stock Tracker Widget - Công cụ theo dõi cổ phiếu và cảnh báo giá tăng giảm bằng C# và WPF
- [VB.NET] Chia sẻ công cụ nhập số tiền tự động định dạng tiền tệ Việt Nam
- [VB.NET] Hướng dẫn fill dữ liệu từ winform vào Microsoft word
- [VB.NET] Hướng dẫn chọn nhiều dòng trên Datagridview
- Hướng Dẫn Đăng Nhập Nhiều Tài Khoản Zalo Trên Máy Tính Cực Kỳ Đơn Giản
- [C#] Chia sẻ source code phần mềm đếm số trang tập tin file PDF
- [C#] Cách Sử Dụng DeviceId trong C# Để Tạo Khóa Cho Ứng Dụng
- [SQLSERVER] Loại bỏ Restricted User trên database MSSQL
- [C#] Hướng dẫn tạo mã QRcode Style trên winform
- [C#] Hướng dẫn sử dụng temp mail service api trên winform
- [C#] Hướng dẫn tạo mã thanh toán VietQR Pay không sử dụng API trên winform
- [C#] Hướng Dẫn Tạo Windows Service Đơn Giản Bằng Topshelf
- [C#] Chia sẻ source code đọc dữ liệu từ Google Sheet trên winform
Hướng dẫn đóng gói phần mềm sử dụng Powershell biên dịch script thành file exe
Xin chào các bạn, bài viết hôm nay mình sẽ hướng dẫn các bạn đóng gói phần mềm thành file cài đặt installer sử dụng script PowerShell.
Sau khi các bạn viết xong phần mềm trên Winform, các bạn cần phải đóng gói phần mềm thành file cài đặt.
Bình thường, các bạn sẽ sử dụng phần mềm: Advance Installer, One Click Install hay Installshield...
Trong bài viết này mình sẽ hướng dẫn các bạn đóng gói ứng dụng tool nhỏ cài đặt sử dụng script PowerShell.
Lợi ích của việc đóng gói này là file cài đặt của bạn khoảng 300MB (nếu bạn nào code bằng Devexpress thì sẽ thấy dung lượng rất nhiều).
Khi cài đặt build thì file Exe chúng ta chỉ còn khoảng tầm 300KB, giúp chúng ta dễ dàng chia sẽ.
Nhược điểm: Muốn cài đặt phải có mạng internet.
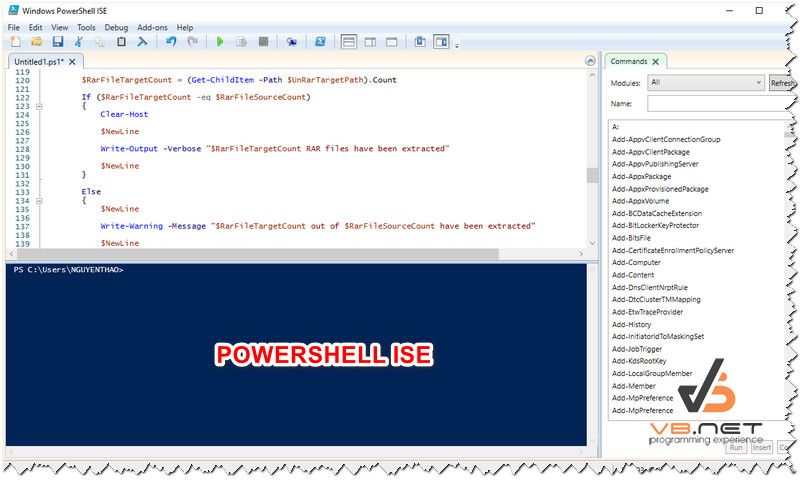
Các bạn có thể mở chương trình Powershell ISE, để code script

Các bước đóng gói phần mềm SVG Collection của mình.
Bước 1: Nén File ứng dụng ở thư mục Release lên hosting web của các bạn
Và khi chạy Script cài đặt chúng ta sẽ thực hiện các bước công việc sau:
Bước 2: Download file từ hosting name VD: https://laptrinhvb.net/svg_csharp.rar
Bước 3: Giải nén file rar vào thư mục chúng ta chỉ định
Bước 4: Xóa File rar chúng ta đã tải về
Bước 5: Chạy mở ứng dụng lên
Bước 6: Tạo shortcut phần mềm trước Desktop.
Script mình viết cũng đơn giản các bạn chỉ cần vào chỉnh sửa các thông số lại là xong nhé.
Sau khi Viết Script PowerShell xong, chúng ta sẽ sử dụng PS2EXE => chuyển file script thành file EXE
Video demo ứng dụng tạo sau khi tạo file cài đặt thành công:
Source code full script PowerShell setup:
[console]::InputEncoding = [console]::OutputEncoding = New-Object System.Text.UTF8Encoding
$host.UI.RawUI.WindowTitle = "Cài đặt phần mềm Powershell - https://laptrinhvb.net"
Add-Type -AssemblyName System.Windows.Forms
$browser = New-Object System.Windows.Forms.FolderBrowserDialog
$browser.Description = "Bạn Hãy chọn thư mục cài đặt phần mềm"
$null = $browser.ShowDialog()
$temp = $browser.SelectedPath
Write-Output $temp
$url = "https://laptrinhvb.net/svg_csharp.rar"
$output = $temp + "svg_csharp.rar"
$start_time = Get-Date

#Import-Module BitsTransfer
#Start-BitsTransfer -Source $url -Destination $output
#OR
#Start-BitsTransfer -Source $url -Destination $output -Asynchronous

Function Get-Webfile ($url)
{
    $dest = $output
    Write-Host "Đang tải $url`n" -ForegroundColor DarkGreen;
    $uri=New-Object "System.Uri" "$url"
    $request=[System.Net.HttpWebRequest]::Create($uri)
    $request.set_Timeout(5000)
    $response=$request.GetResponse()
    $totalLength=[System.Math]::Floor($response.get_ContentLength()/1024)
    $length=$response.get_ContentLength()
    $responseStream=$response.GetResponseStream()
    $destStream=New-Object -TypeName System.IO.FileStream -ArgumentList $dest, Create
    $buffer=New-Object byte[] 10KB
    $count=$responseStream.Read($buffer,0,$buffer.length)
    $downloadedBytes=$count
    while ($count -gt 0)
        {
        [System.Console]::CursorLeft = 0
        [System.Console]::Write("Đang tải phần mềm {0}K of {1}K ({2}%)", [System.Math]::Floor($downloadedBytes/1024), $totalLength, [System.Math]::Round(($downloadedBytes / $length) * 100,0))
        $destStream.Write($buffer, 0, $count)
        $count=$responseStream.Read($buffer,0,$buffer.length)
        $downloadedBytes+=$count
        }
    Write-Host ""
    Write-Host "`nDownload of `"$dest`" finished." -ForegroundColor DarkGreen;
    $destStream.Flush()
    $destStream.Close()
    $destStream.Dispose()
    $responseStream.Dispose()
}

Get-Webfile $url


Write-Output "Time taken: $((Get-Date).Subtract($start_time).Seconds) second(s)"

Set-Location $temp

Function Extract-WinRarFiles
{

      [cmdletbinding()]

    Param
    (
        [Parameter(HelpMessage='Enter the local path to the unrar.exe program')]
            [ValidateNotNullOrEmpty()]
            [ValidateScript({ Test-Path -Path $_ })]
            [Alias('UREP')]
            $UnRarExePath = "$env:ProgramFilesWinRARUnRAR.exe",

        [Parameter(Mandatory = $true,
            HelpMessage='Enter the local file path where the WinRar files are located that you would like to extract')]
            [ValidateNotNullOrEmpty()]
            [ValidateScript({ Test-Path -Path $_ })]
            [Alias('URSP')]
            $UnRarSourcePath,

        [Parameter(Mandatory = $true,
            HelpMessage='Enter the local file path location you wish to extract the content to')]
            [ValidateNotNullOrEmpty()]
            [ValidateScript({ Test-Path -Path $_ })]
            [Alias('URTP')]
            $UnRarTargetPath,

        [Parameter(HelpMessage='Use this parameter to open the directory the extracted files are located in')]
            [ValidateNotNullOrEmpty()]
            [Alias('OTL')]
            [switch]$OpenTargetLocation,

        [Parameter(HelpMessage='Use this parameter to delete the original RAR files to help save disk space')]
            [ValidateNotNullOrEmpty()]
            [Alias('DSRF')]
            [switch]$DeleteSourceRarFiles
    )

    Begin
    {
        $NewLine = "`r`n"

        $RarFilePaths = (Get-ChildItem -Path $UnRarSourcePath -Recurse | Where-Object -FilterScript { $_.extension -eq '.rar' }).FullName

        $RarFileSourceCount = $RarFilePaths.Count
    }

    Process
    {
        $NewLine

        Write-Output -Verbose "Total RAR File Count: $RarFileSourceCount"

        $NewLine

        Write-Output -Verbose "Beginning extraction, please wait..."

        Start-Sleep -Seconds 2

        Foreach ($FilePath in $RarFilePaths)
        {
            &$UnRarExePath x -y $FilePath $UnRarTargetPath
        }

        $RarFileTargetCount = (Get-ChildItem -Path $UnRarTargetPath).Count

        If ($RarFileTargetCount -eq $RarFileSourceCount)
        {
            Clear-Host

            $NewLine

            Write-Output -Verbose "$RarFileTargetCount RAR files have been extracted"

            $NewLine
        }

        Else
        {
            $NewLine

            Write-Warning -Message "$RarFileTargetCount out of $RarFileSourceCount have been extracted"

            $NewLine
        }
    }

    End
    {
        Switch ($PSBoundParameters.Keys)
        {
            { $_ -contains 'OpenTargetLocation' }
            {
                $NewLine

                Write-Output -Verbose 'Opening RAR target location...'

                Start-Sleep -Seconds 5

                Invoke-Item -Path $UnRarTargetPath
            }

            { $_ -contains 'DeleteSourceRarFiles' }
            {
                $NewLine

                Write-Output -Verbose 'Deleting source RAR files and the directory...'

                Start-Sleep -Seconds 5

                Remove-Item -Path $UnRarSourcePath -Recurse -Force
            }
        }
    }
}


Set-Location $temp
$appPath = $temp + "SGV Collection.exe"

 Extract-WinRarFiles -UnRarSourcePath $output -UnRarTargetPath $temp -DeleteSourceRarFiles
 Write-Output "Time taken: $((Get-Date).Subtract($start_time).Seconds) second(s)"
 Remove-Item *.tmp -recurse -force
 Start-Process -FilePath $appPath

 $WshShell = New-Object -comObject WScript.Shell
$Shortcut = $WshShell.CreateShortcut("$HomeDesktopSGV Collection.lnk")
$Shortcut.TargetPath = $appPath
$Shortcut.Save()
write-host "Setup finish..."
write-host "Press any key to exist..."
#[void][System.Console]::ReadKey($true)
Sau khi tạo script xong để biên dịch File script thành File EXE các bạn vào đường dẫn github PS2EXE sau để xem chi tiết tạo file setup.
https://github.com/MScholtes/PS2EXE
Bước 1: Các bạn mở chương trình PowerShell lên
Bước 2: Gõ lệnh tải PS2EXE về
PS C:> Install-Module ps2exeBước 3: Lệnh đóng gói, các bạn chỉ chọn đường dẫn file script và file xuất exe
Invoke-ps2exe .source.ps1 . arget.exeKhi build File Exe, nếu các bạn muốn chỉnh sửa các tham số Assembly hay icon của ứng dụng, khi build các bạn làm theo cú pháp bên dưới:
ps2exe [-inputFile] '<file_name>' [[-outputFile] '<file_name>'] [-prepareDebug]
       [-x86|-x64] [-lcid <id>] [-STA|-MTA] [-noConsole] [-UNICODEEncoding]
       [-credentialGUI] [-iconFile '<filename>'] [-title '<title>'] [-description '<description>']
       [-company '<company>'] [-product '<product>'] [-copyright '<copyright>'] [-trademark '<trademark>']
       [-version '<version>'] [-configFile] [-noOutput] [-noError] [-noVisualStyles] [-requireAdmin]
       [-supportOS] [-virtualize] [-longPaths]
Thanks for watching!


